12.12.3. Using @snapshot_volreg
@snapshot_volreg is an useful program for quickly evaluating
alignment between two datasets, for example between a subject’s
anatomical and an EPI volume, or between an anatomical and a standard
space template. This program creates an edge-ified overlay of one data
on the underlayed other, allowing for quick checks of the similarity
of major brain features.
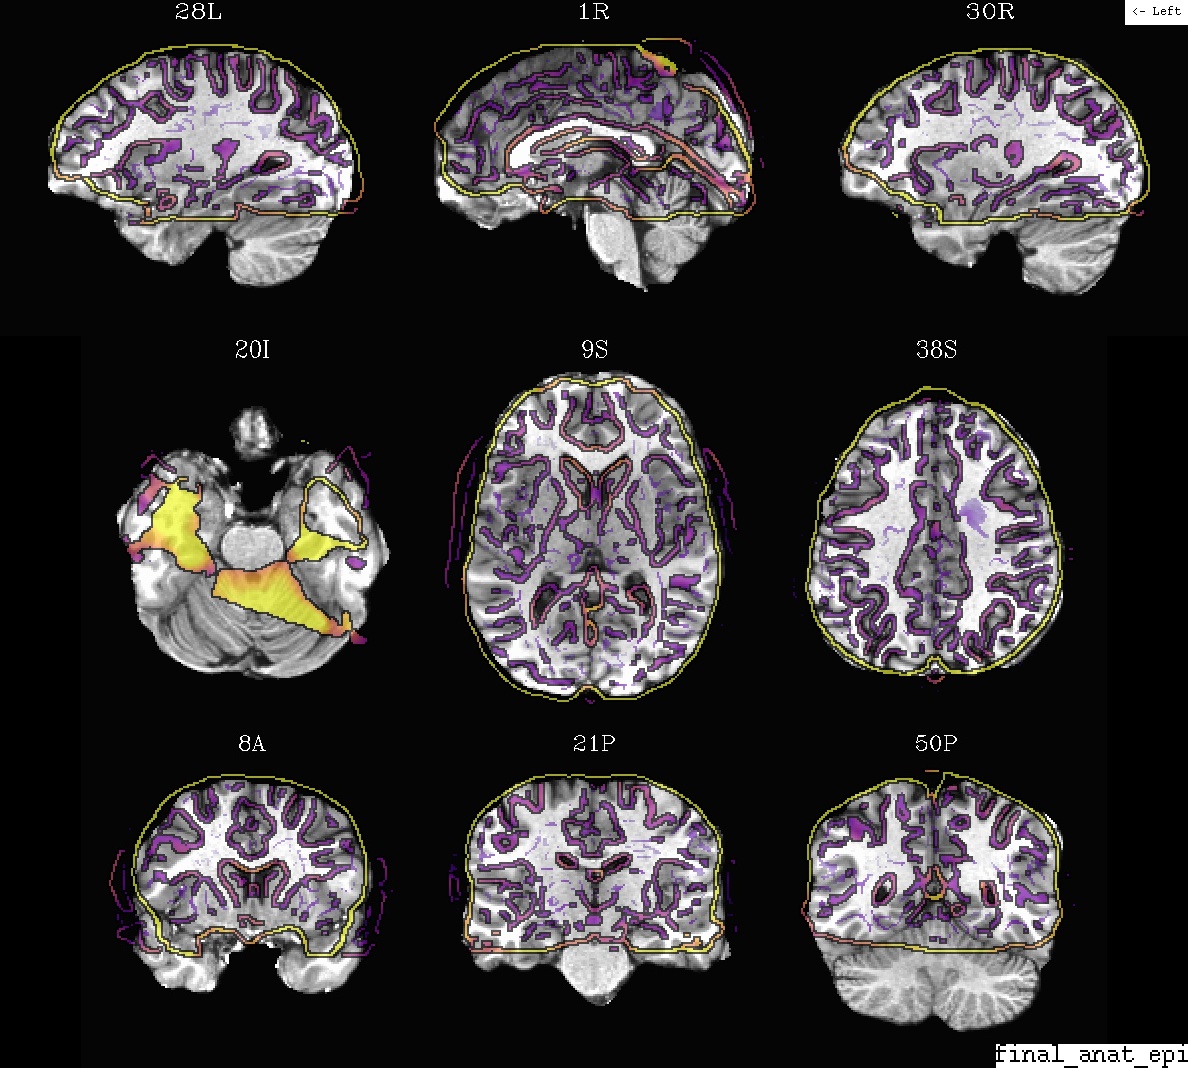
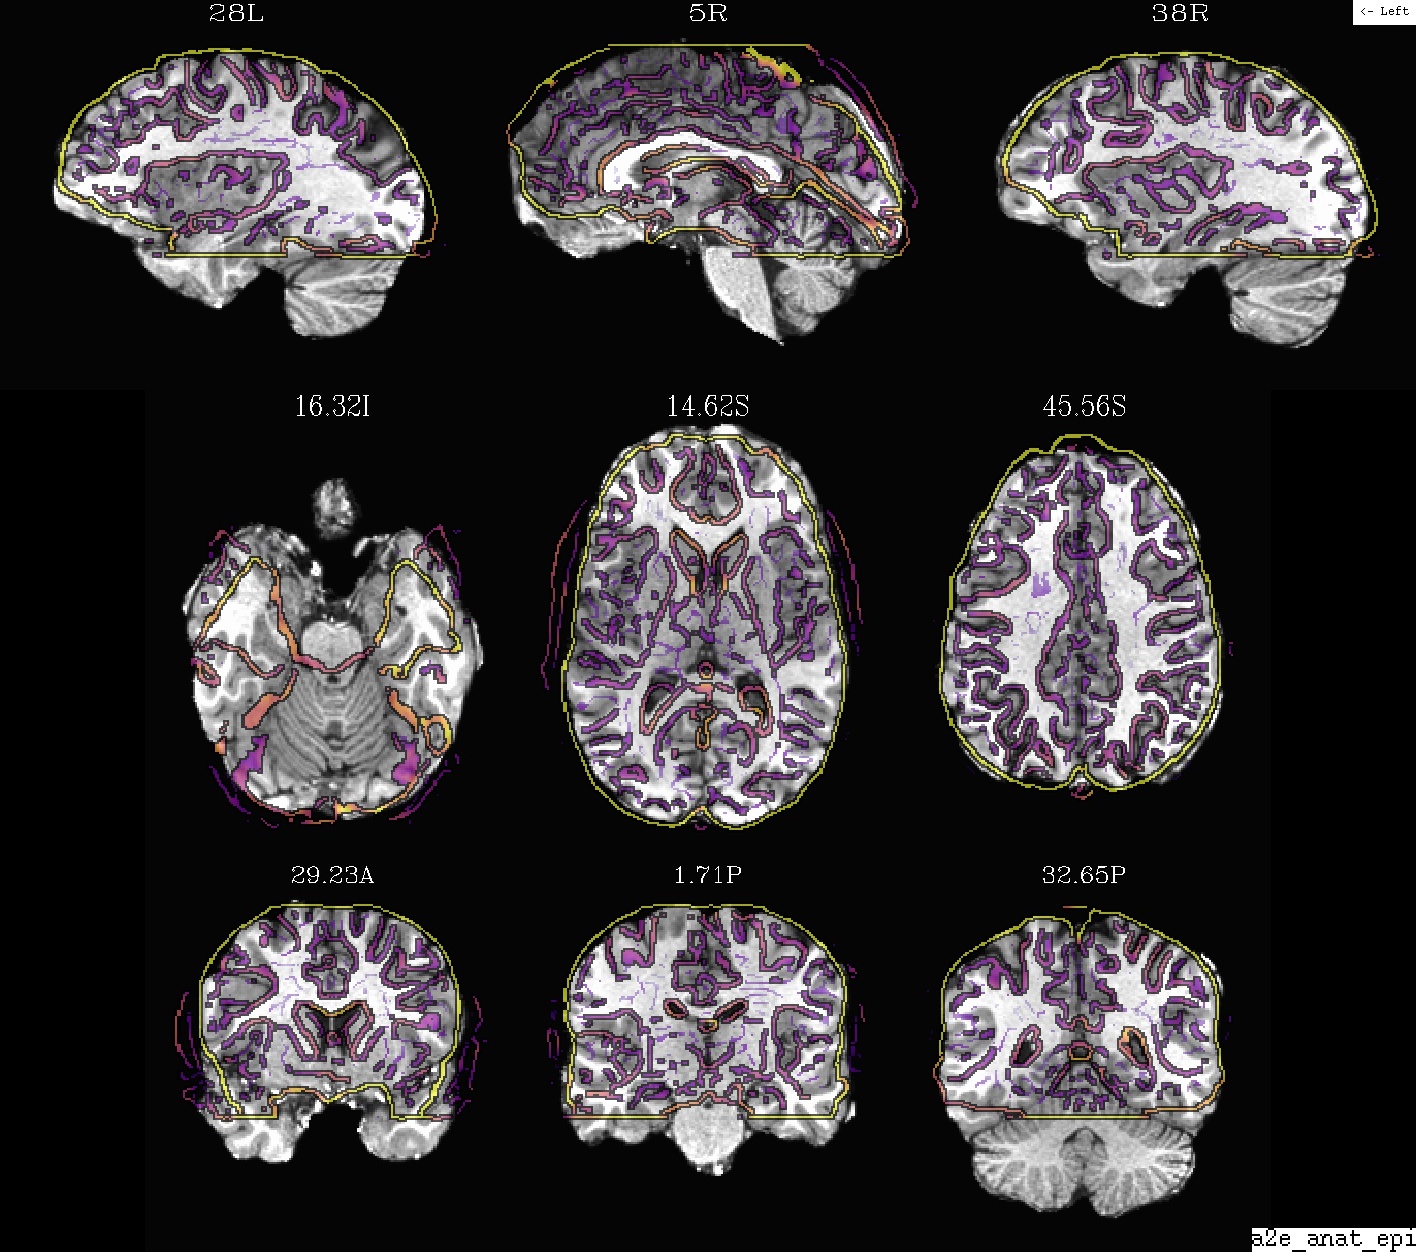
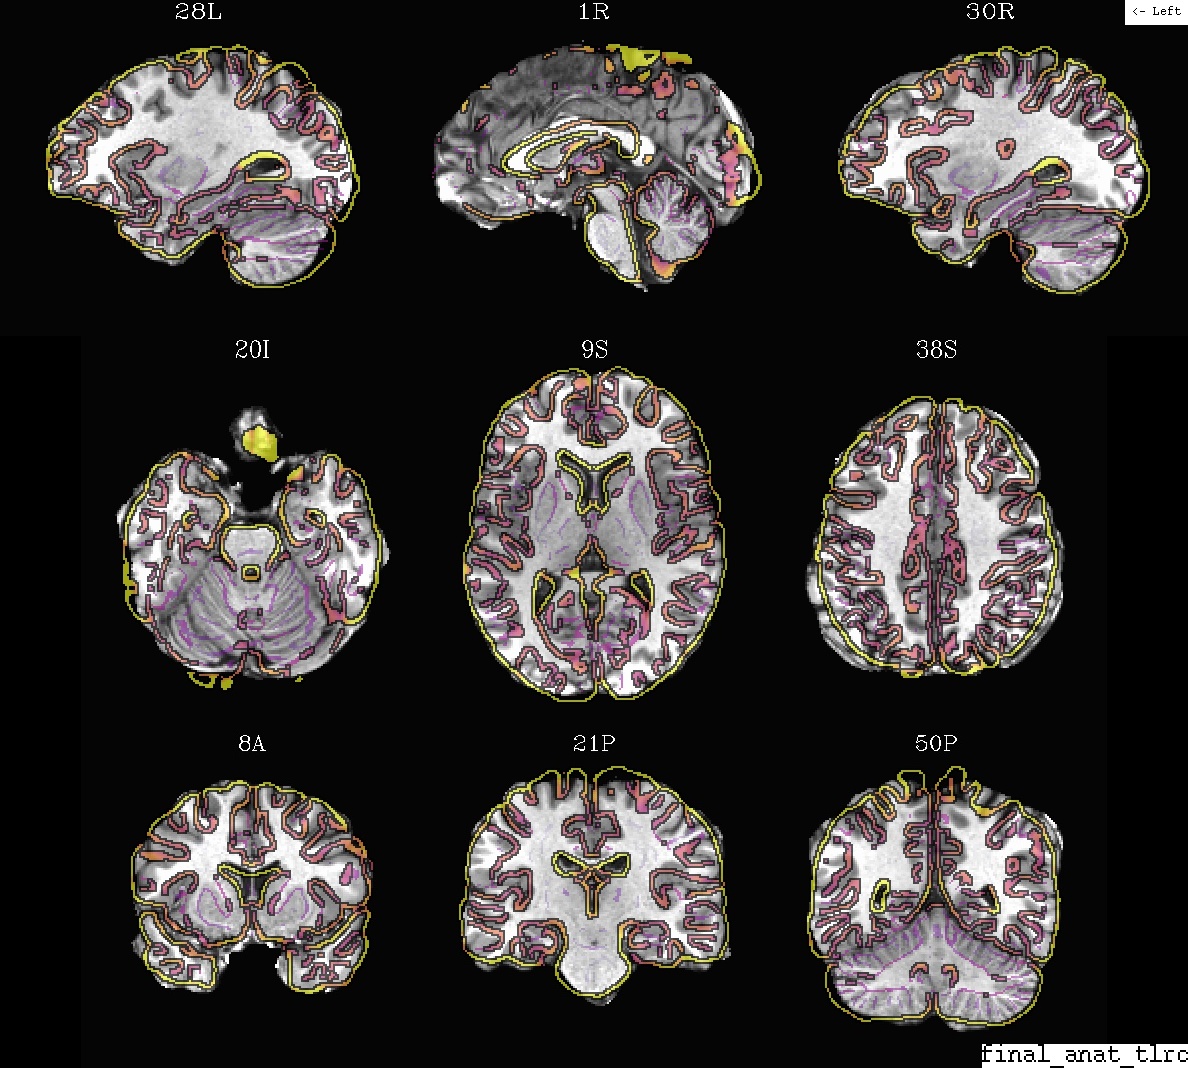
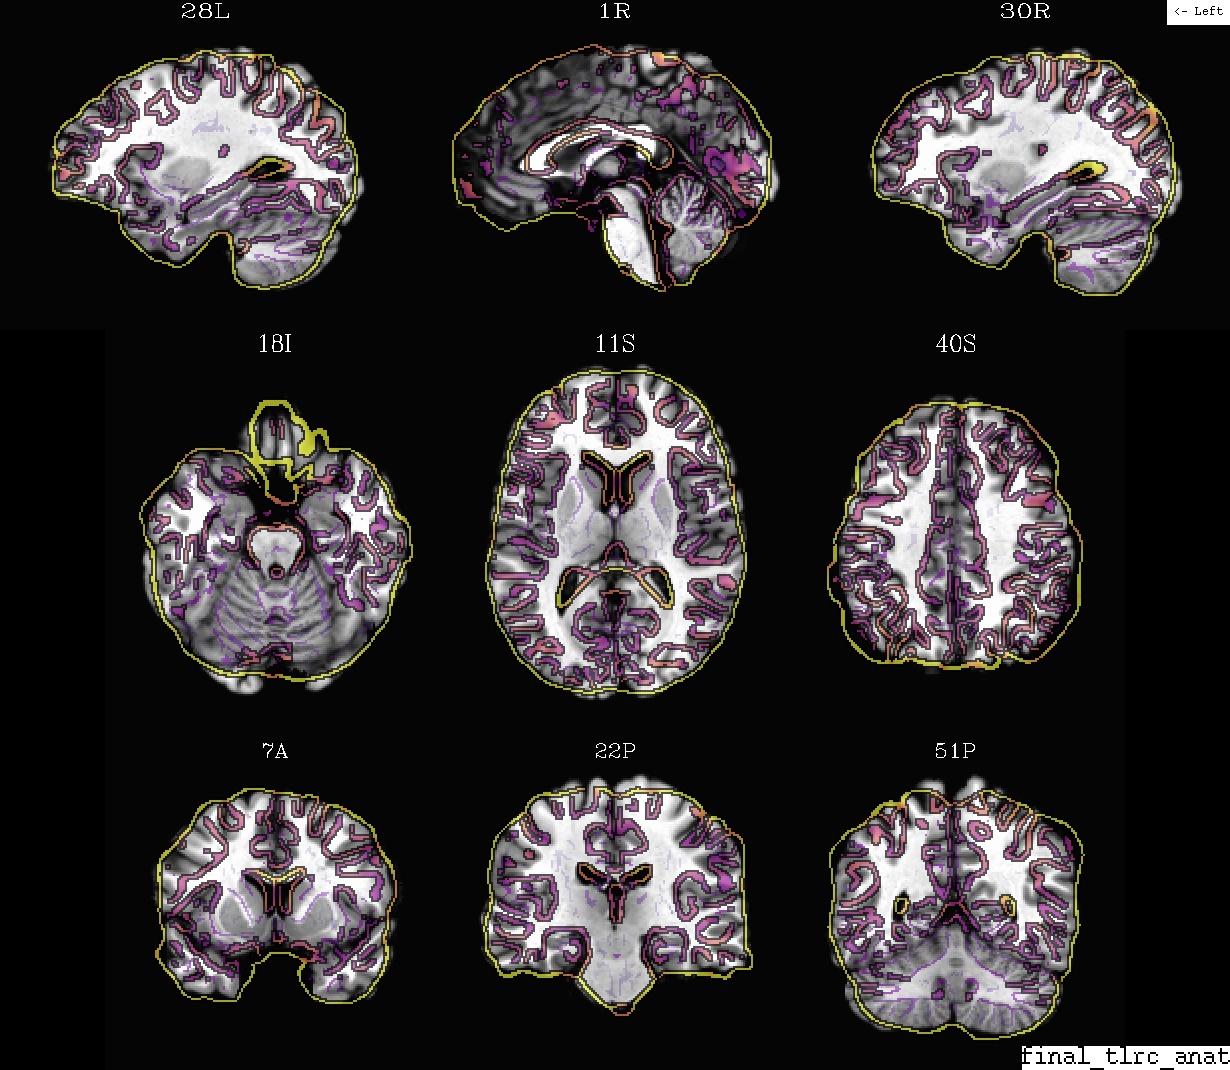
The output is a montage: one row each of axial,
coronal and sagittal slices.
NOTE: when evaluating goodness of alignment, you want to see how well the edges of structures and features line up. You will also see additional information such as the FOV coverage of your data set and possibly useful things like how well skull-stripping was done. To some data sets more deeply, you may want to follow-up by looking at them interactively in the AFNI GUI.
Examples
Syntax: The application of this program is really pretty straightforward: provide the ulay volume name, the olay volume name, and then possibly a prefix for the output JPG file.
The examples presented here use publicly available data, distributed
as part of the freely downloadable AFNI Bootcamp demo sets (see
here). Specifically, these commands refer to
files in the AFNI_data6/FT_analysis/FT/ directory, and then
datasets created from that subject’s data using the class
afni_proc.py example. Therefore, for most of the examples here,
you will have wanted to run the following in order to follow along at
home:
cd ~/AFNI_data6/FT_analysis/
tcsh s05.ap.uber
After that, there will be a subdirectory of afni_proc.py results
created called FT.results/, and unless otherwise stated the
example commands here are run within that directory
(AFNI_data6/FT_analysis/FT.results/).
Note
In this example Bootcamp script, only linear affine alignment is performed to standard space. In real analyses, we typically recommend using nonlinear warping, but that takes too long for the script to run within the Bootcamp class lecture time. Therefore, one might expect pretty good, but not excellent, alignment between the subject volumes and the standard space template here.
But the point of these examples is viewing the data, indeed to find out such things, so we aren’t really bothered by that here.
Ex. 0: Anatomical + EPI alignment (in final template space)
A display of how the anatomical and an EPI volume overlay after alignment. The dsets are shown after their warping to standard space.
The anatomical is the underlay (setting the grid resolution), and the olay is “edge-ified”.
- show code y/n -Example 0: anat (ulay) and EPI, in template space |
|---|
|
Ex. 1: Anatomical + EPI alignment (in intermediate EPI space)
The same datasets as the preceding example, but with the volumes shown in the EPI space (as calculated by align_epi_anat.py in an intermediate step in the “align” block). Just a bit of a different perspective.
- show code y/n -Example 1: anat (ulay) and EPI, in EPI space |
|---|
|
eog group/sub-*/svr_*final_anat_epi.jpg) and since see if any
major differences popped out, since they should all be aligned to
the saaaame space. However, if something went wrong, it would be
nice to check individual alignment steps to see which one went wrong
(EPI -> anat, or anat -> template, or …), too.Ex. 2: Anatomical + template alignment (in final template space)
A display of how the anatomical and standard space template volume overlay after alignment. The dsets are shown after their warping to standard space, with the warped subject anatomical as the ulay.
- show code y/n -Example 2: anat (ulay) and template, in template space |
|---|
|
Ex. 3: Anatomical + template alignment, II (in final template space)
The same as the preceding example, but with the warped subject anatomical as the olay on the reference template. Just a bit of a different perspective.
- show code y/n -Example 3: template (ulay) and anat, in template space |
|---|
|
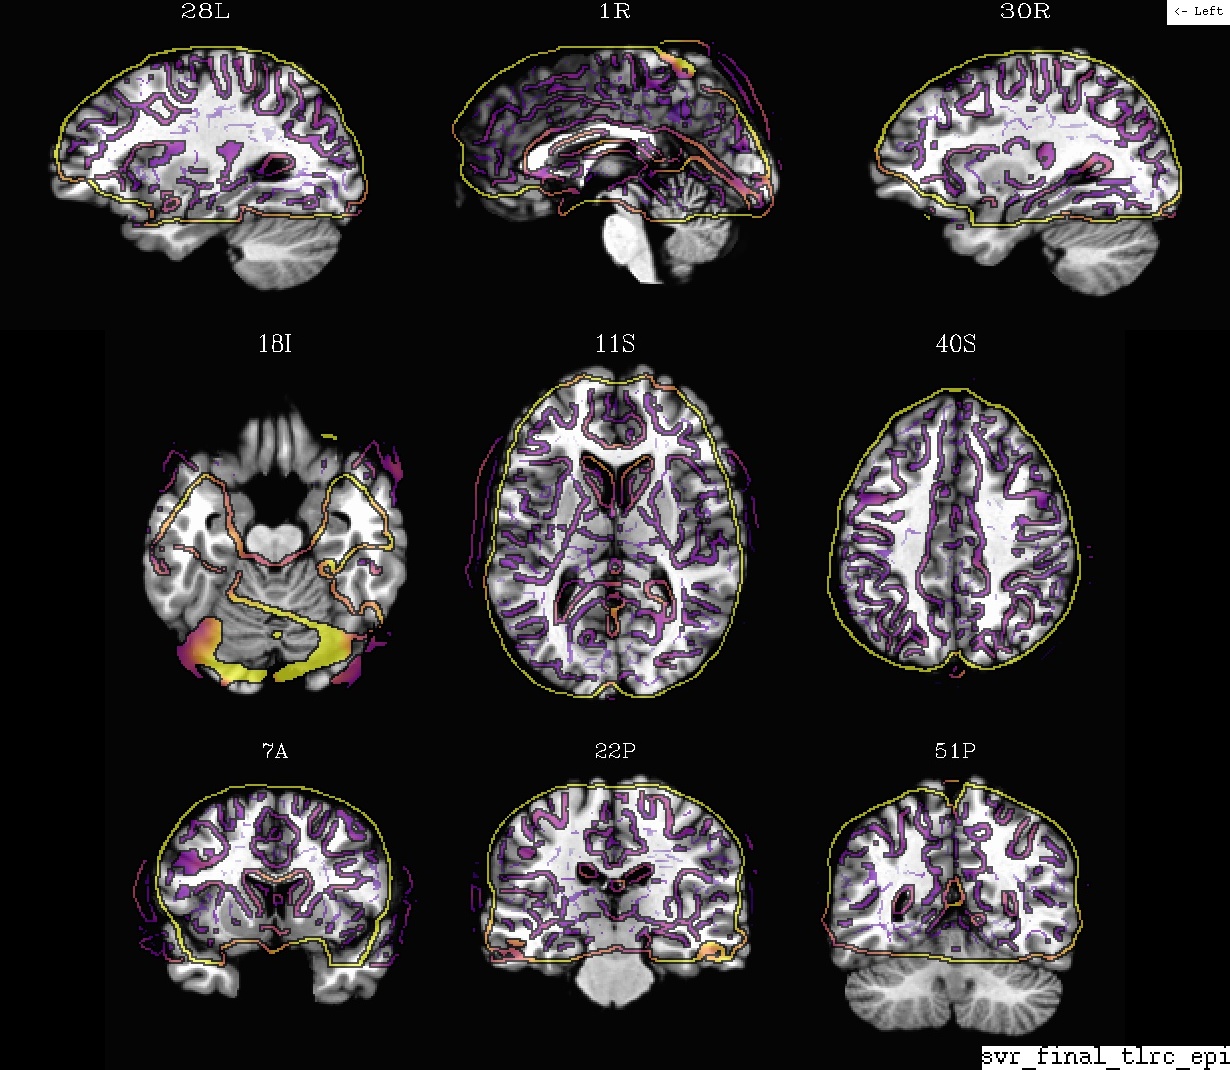
Ex. 4: Template + EPI alignment (in final template space)
A display of how the EPI and standard space template volume overlay after alignment. The dsets are shown after their warping to standard space, with the standard template as the ulay.
- show code y/n -Example 4: template (ulay) and EPI, in template space |
|---|
|
Ex. 5: @SSwarper results for anatomical-to-template alignment
The @SSwarper program performs both skullstripping of an
anatomical volume and nonlinear alignment to standard space (these
dual roles feed into each other, so it can be useful to do them
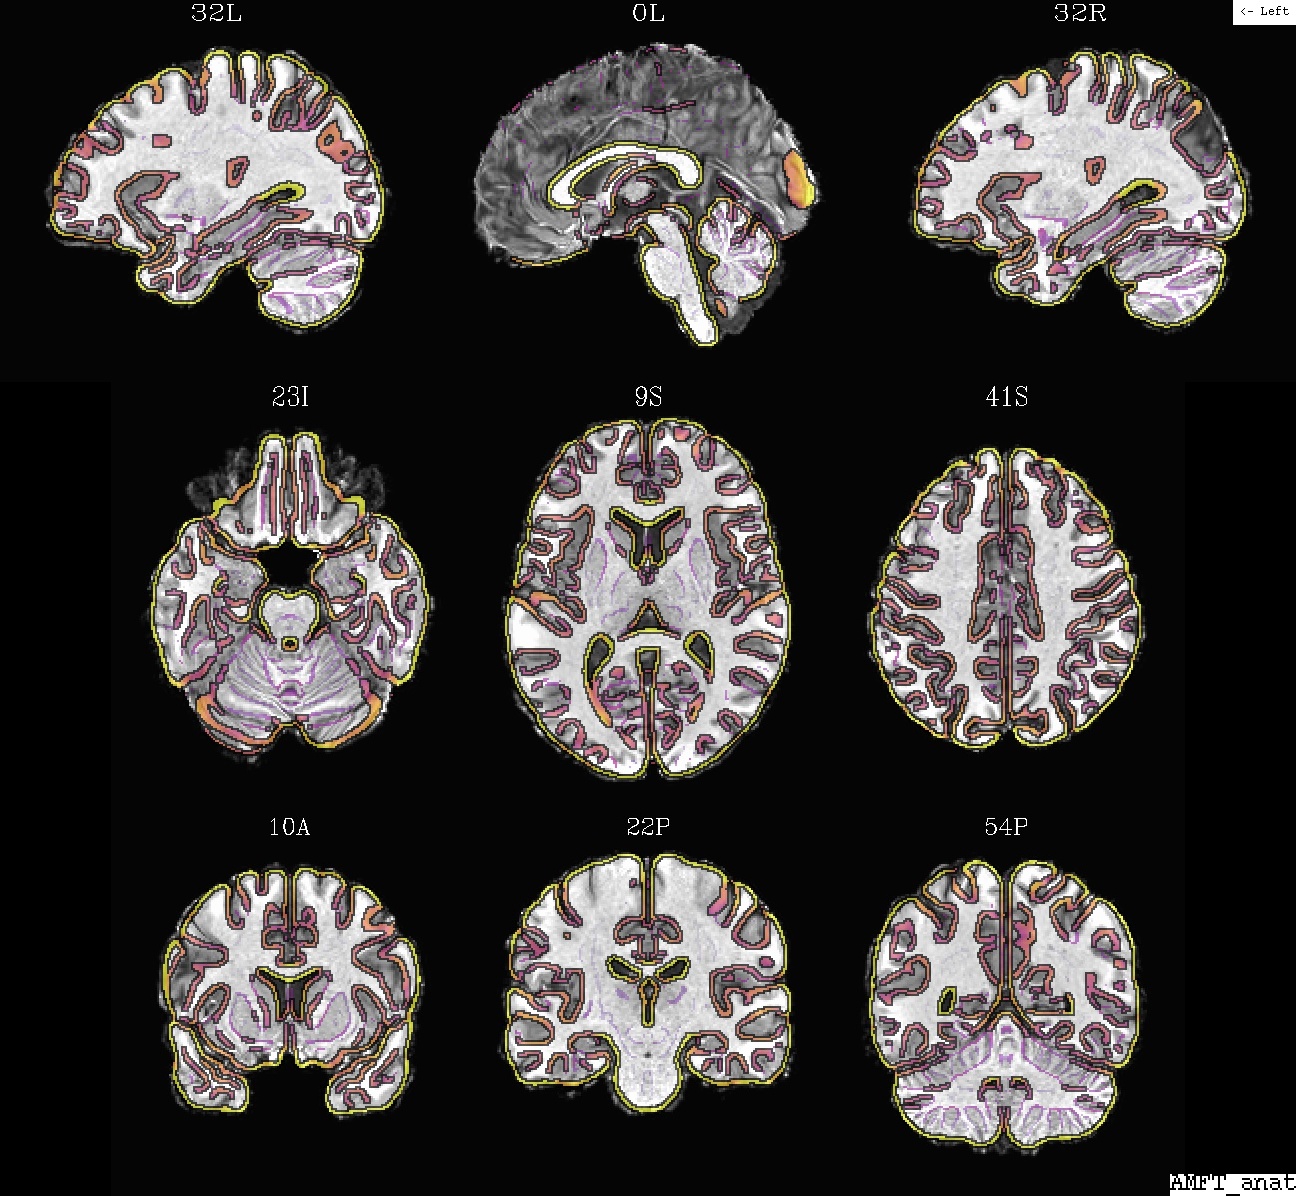
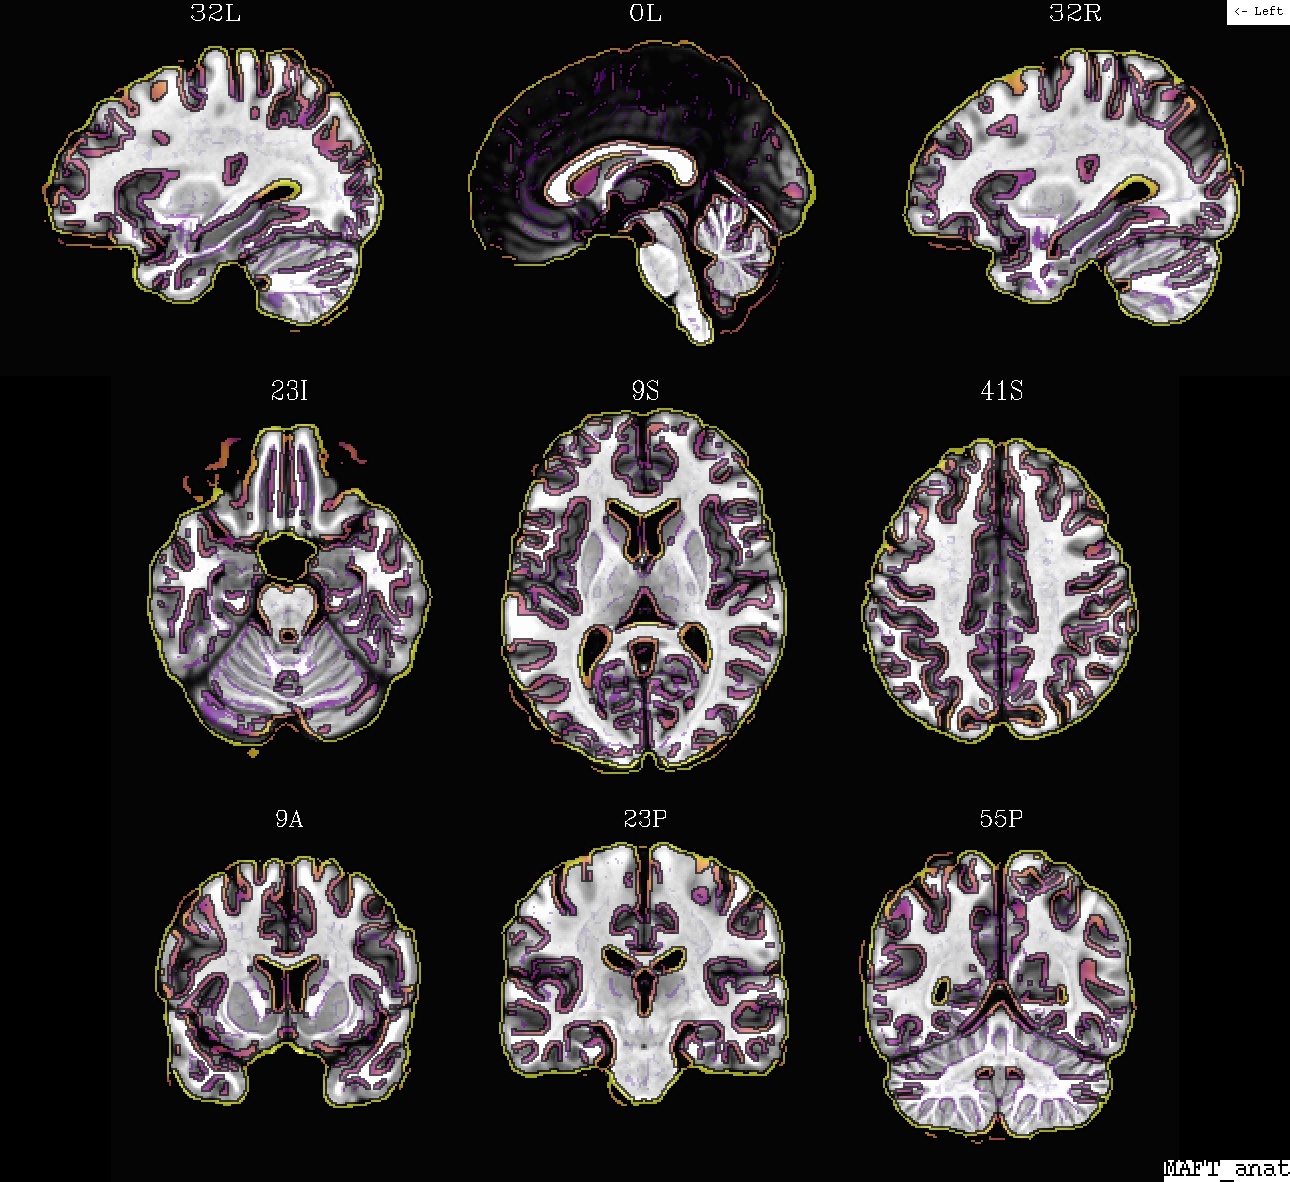
simultaneously). The program also uses @snapshot_volreg
internally, twice, to provide auto-QC imaging of results of both
features (anat under template edges, and template under anat edges).
For more information about @SSwarper (get to know it!), and how it
can be used as a useful precursor to afni_proc.py, see the
@SSwarper help page and the @SSwarper template base
page.
The present example is run in a different location than the others,
and does not require the “s05*” script to have been run. It is run
in: /data/CD/AFNI_data6/FT_analysis/FT.
Parallelization: note that since @SSwarper wraps around 3dQwarp
for nonlinear alignment, you will want to be using the inherent
parallelizability of the program on your computer (if you have
multiple cores). It has a default value, and you control this by
setting the “OMP_NUM_THREADS” environment variable in either a script
or your RC files (just running the help file of 3dQwarp should
show you what it is presently set at). If you have any questions
about this, just ask!
Example 5a: @SSwarper results (AM*.jpg), anat (ulay) and template, in template space |
|---|
|
Example 5b: @SSwarper results (MA*.jpg), template (ulay) and anat, in template space |
|---|
|
